| Chrysler 300 Rear Brake Replacement | |
|
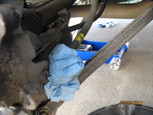
2011.03.19 I mentioned in my blog that I was backing out of the driveway at idle a couple of weeks ago and had an issue with a loud clunk followed by a full stop. Putting the car in drive would end in the same result. If I pressed down on the gas peddle, the car would continue on without any problems. My initial thought was a problem with the rear differential. I grabbed my wife and had her stand at the rear of the car as I moved the car from drive to reverse and back again to track down where the clunking was coming from. After a couple of passes, it was determined that the sound was coming from one of the rear rotors. I jacked the car up and proceeded to remove the tire, caliper, and rotor. To my surprise, the parking brake pad had separated from the shoe and was getting jammed up inside the rotor. Since it was late Sunday afternoon, I decided to pull both the parking brake parts off and go without until I get replacement parts in. I had replaced the front pads and rotors in 2009 and decided while I was getting parking brake parts, to go ahead and get rear rotors and pads. In addition, I also got a new set of ceramic pads for the fronts as well. I ordered premium slotted rotors, Posiquiet ceramic pads, and Centric parking brake shoes/pads from R1 Concepts, parking brake hardware kit (spreader/springs) from Rock Auto. Fluid, caliper paint, and all the other sundries came from the local AutoZone. All in all, brake parts ended up costing just under $300.00, which is not bad at all. Today, the plan is to replace the parking brake hardware, rear rotors, paint the rear calipers, and replace the front pads. Ideally, I have should have plenty of time to get everything done in one day. Here is a picture of the rear brakes prior to work being done. 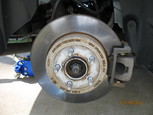
Once the car is jacked up and secured, with the wheel removed, the first step is to remove the brake caliper. This is done by removing the two caliper pins using a socked and a wrench. At this time, I am leaving the brake line attached and putting the caliper off to the side tucked in the suspension so the brake line is not being pulled. 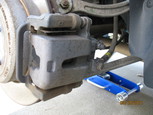
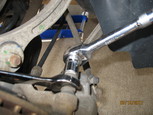
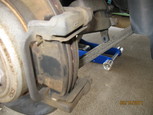
Once the caliper is out of the way, now we can remove the brake pads with should just slide out. Once the pads are removed, I'll remove the caliper bracket which is held on by two bolts. 
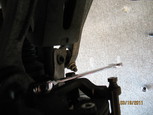
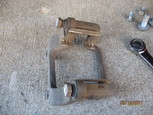
Since I had removed the parked brake hardware prior to this, the rotors just pull right off. If you have the parking brake set (which is normal to do when jacking the car up), go ahead and release the brake. Just make sure that the car is secured. You may need to wrestle the rotor to get it off depending on how tight the parking brake is. Also make sure that there are no star nuts holding the rotor in place at the lug. These can be just clipped off and will not be replaced. Here is picture with all of the required parts removed. 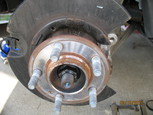
Now its time to prep the caliper for paint. The first step is to remove the brake line from the caliper. When removing the bolt, there are two copper washers on both sides of the bolt. Do NOT lose these. ** NOTE: This is the first time I have ever breached the brake lines and I am making up some of this as I go. I initially wrapped the brake line with a shop rag to keep fluid from going all over the place, this will not work and will result in a big mess. Unfortunately, I did not know this until I came back after the initial coat of paint.. 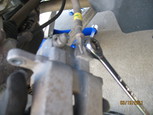
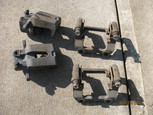
The first step in prep is to remove the pad hardware and caliper pins. Then I cleaned up the calipers and brackets using brake cleaner, a metal brush, and an old tooth brush. In hindsight, it was probably a good idea to get a caliper rebuild kit and redo the pistons and boots. Fortunately, my parts looked alright. 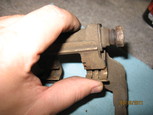
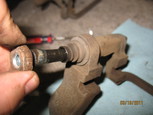
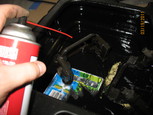
I used some spare bolts to block the brake line holes and taped up the caliper pin and piston boots. Using VHT black caliper paint (rattle can) I go ahead and give a couple coats of paint. 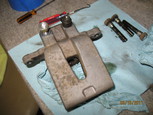
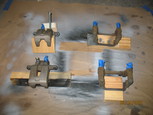
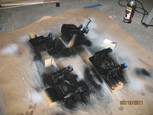
While waiting for the paint to dry, I went ahead and replaced the front pads. Since this is documented in the other projects page, I won't go into any detail here. With the front pads replaced and another coat of paint on the caliper hardware, I turn my attention to the parking brake. Before I started, I noticed that the wheel hubs are pretty rusted. I opted to give them a coat of rust converter. Given the parts are made to rust, this was purely an aesthetic measure. The parking brake is made up of two shoes that are held together with a spreader (my name for it), cable actuator, springs, and anchor pins. The hardest part with the parking brake is getting the anchor clips fastened which is a test of will and will guarantee anyone within a 50ft radius will be showered in profanities. The first step is getting the spreader hooked up to the brake cable. There is a hook in the spreader that needs to be pushed all the way back and then its a matter of just slipping the hook into the cable end. I then go ahead and put the top anchor pin in, followed by the upper shoe. Follow the same procedure for the lower shoe. With the shoes resting on the cable actuator, use the heavier of the two springs and attach the two shoes together. 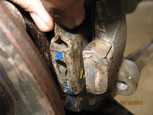
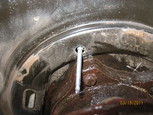

With the spring in place, the pads will want to pull together. I used a piece of wood between the shoe and wheel hub as a shim. Now go ahead and secure the anchor pins with the supplied clips. Probably a good idea to have safety glasses on and a lot of patience. With the clips attached, now put the spreader bolt in between the shoes on the other side and attach the other spring (not shown). 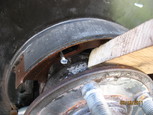
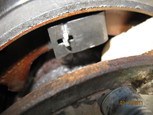
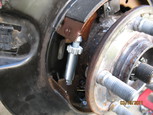
There is a small lip on the backing plate (dust shield?, make sure that the shoes are flush with the lip and not actually resting on it. Use the adjustable spreader to push or pull the shoes to they match close to the lip. Once you get it ball park, put the rotor on and turn it to see how freely it turns. Keep increasing the spread until you start hearing the pads make contact and then back it up a couple of turns. Now press the parking brake peddle down to see how things feel. The rotors should not move at all now. Keep adjusting until you get free movement with the parking brake off and no movement with the parking brake on. Here are pictures of the complete parking brake assembly without and with the new rotor installed. 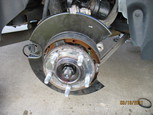
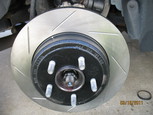
At this point, I have been working from around 10:30a to 3:00p and had to stop to run some errands with the wife. We got back late and I had just enough time to get the parking brakes done, calipers mounted, and brake lines attached. The sun was falling fast and I needed to put up the tools and clean up the slew of brake fluid that had leaked out throughout the day. With the calipers removed for paint, I had no way of stopping the fluid from coming out of the brake line. There was some suggestions of crimping the brake line, but I heard that was a no no, as it could damage the line. I tried bolts, tape, plastic wrap, but no luck. The only good thing that came out of it was that I had fully flushed (probably twice) the rear end of the brake system. In my rush to clean up all the tools and puddles of fluid, I did not get a chance to take any more pictures (sorry). With the rotor back on, its just a matter of putting the caliper bracket back on and then attaching the caliper to the bracket. 2011.03.20 It was supposed to be a nice day according to the weather people, but I wake up to low 40 degree temps and rain, a lot of rain. Sunday morning, the car is up on jacks, and its pouring down rain. I look at the radar and it looks like its going to rain pretty much the whole day. I make a cup of coffee, get the rain gear on, and proceed to finish up the brakes. Really, the only thing that was left to do was to bleed the brake system. I had purchased a vacuum bleeder to assist and proceeded to bleed the brakes. Again, due to the rain, I couldn't take any pictures... I started at the rear passenger side of the car and attached the vacuum bleeder. I pumped the brakes until I got a hard peddle. I then cracked the bleeder screw and let the fluid flow out until I no longer see any air bubbles. I repeat this procedure for the drivers rear, passenger front, and then drivers front wheels. Each time making sure that the peddle is hard and I have plenty of fluid in the reservoir. Once completed, the brakes still feel kind of spongy, so I repeated all four wheels without any change. I am not getting any bubbles whatsoever. Tired of being in the rain and freezing my rear off, I put the wheels back on the car and test the brakes in the driveway. Brakes are gripping pretty good, but the peddle still feels mushy to me. I park the car in disgust and head inside to get out of the rain. Took a hot shower and had a nap. I wake up about an hour later to sunny skies and warmer temperatures, go figure. I take a short test drive with the wife and kid and other than a mushy peddle, no problems. We get back and I have the wife help me with a manual bleed. I have my wife pump the peddle until it gets hard and then continue pressing the peddle while I crack the bleeder screw. As the peddle falls to the floor, she yells out the peddle is at the floor and I close the bleeder screw. Repeat this a couple of times for each wheel. This results in the brake peddle being a lot more stiff. I caught my mechanic neighbor later that night and explained my problems. Thinking that I was not using the vacuum bleeder correctly, he told me that my procedure sounded right, but sometimes it takes a good manual bleed to get it right. Back to Chrysler Projects |
|


