| Chrysler 300 Leather Seat Repair | |
|
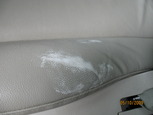
2009.05.10 My wife got me the Chrysler 300 from her work. While it has some mileage on it, it was in pristine condition with the exception of a tear on the drivers side leather seat and a couple of deep (primer level) scratches. The car was well taken care of. One of the priorities I had when I got the car was to get the seat repaired. I knew the longer I used the car with the tear in place, the tear would get bigger and bigger. I did some research and found that I have a couple of options. One was to start searching the junk yards for a replacement seat out of a wrecked car which is a viable option in both price and I would be able to drive my car almost immediately. Another option was to have the seat re-upholstered which was not an option because the I wouldn't be able to drive the car until the seat was done and its also pretty expensive. The last option was to try a leather repair kit. I figured that if the leather repair kit didn't work, I would start searching the junk yards for a replacement seat. I googled for leather repair kits and read reviews for a number of different products (there were quite a few) and finally decided on the Magic Mender repair kit. This was one of the few kits that had colors for car interiors, so it was easy to order the kit with the correct dye. A complete kit costs $50.00 +shipping, so I am not out too much money if it doesn't work. I ordered the kit and received it a couple of days later. Here is a picture of the tear: 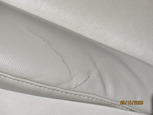
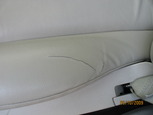
The first step is to clean the area with mild soap and water. When dry, wipe down the area with rubbing alcohol. After that dries, I apply a thin layer of the repair compound: 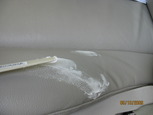
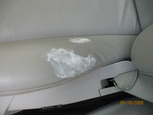
After the compound has dried (about an hour). I lightly sanded the compound with 600 grit sandpaper (supplied with kit) and wipe down the area again with rubbing alcohol. 
Wait for a couple of minutes for the alcohol to evaporate and then apply the first base coat of dye. 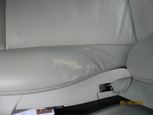
I wait for about 20 minutes and then add additional light coats, waiting 20 minutes between coats. While adding coats of dye, I am going further and further out from the repair to feather out the dye. There is a slight difference in color (due to UV exposure of the seat and other environmental conditions), so the feathering blends the color in better and makes the repair less noticeable. Here are before and after pictures of the repair: 
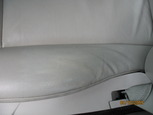
You will notice a little streaking of the dye in the picture above. You really do not notice this in the sunlight, but I may have to come back later and touch it up a little. The only downside to this kit is that you lose the texture in the repair. There is a spray bottle that you can use with water that will supposedly add texture, but I could not get ideal results. Since this repair is pretty small and the existing texture is wearing down due to normal wear and tear, this is not an issue. Overall, I am very happy with the Magic Mender kit. It does take a little patience to use, but if you take your time (I admittedly was a little rushed), the results are very impressive. Back to Chrysler Projects |
|


