| Chrysler 300 Android Double Din Stereo ** IN PROGRESS ** | |
|
2017.01.22 I've recently gotten tired of the Pioneer AVIC-D3 head unit that has been in the car since 2010. I bought this unit used from a LXForums user. It is still a great solid performing stereo, with features like Bluetooth, GPS Navigation, DVD, and for me, iPod integration. The now-dated looking user interface of the stereo is probably the biggest reason for change, followed close second to the dependence of my now dying iPod 32G Video. It also didn't help that GPS navigation updates have stopped being released for this unit. Prerequisites My primary needs right now are MP3 playback, GPS navigation with traffic updates, and hands-free Bluetooth. With the AVIC-D3, I also had rear camera, so that would be nice to keep (seems pretty standard nowadays anyway). Ideally, I would like to keep costs down (say <$600), but with two hour daily commutes, it is not a top factor in the decision process. MP3 playback needs to support playlists and be fairly flexible in options for playback. GPS navigation will need to updateable maps to some extent. Research and Purchase I have been looking at replacement units for the better part of 2016. Since the AVIC treated me so well over the past six years, it was only fair to start looking at Pioneer units. Starting at the top of the line is the AVIC-8200NEX series. Even though the unit had everything I needed, price was around 1k USD, this was a bit out of my reach. Heck, even the 6200NEX units were a bit beyond my budget. I also looked at Alpine, Kenwood Excelon/DNX, and Clarion units. Up until mid-2016, the Alpine INE was looking like the winner. That is, until I saw a forum thread discussing how the cheapy eBay Chinese Android units fared. I was surprised to see that for the most part, they were very happy with it. I pondered for the next couple of weeks. How nice would it be to have a pure-Android based stereo. Google PlayStore, ability to customize, not locked into a specific vendor UI or map software. Sure, there were quality concerns, but for the price. It was very enticing. So, from mid-2016 to the end of the year, I combed over the multitude of eBay listings and various car stereo forums. I also started checking out the XDA-Developer forums (Android development). While support for the units were limited, there was some good info. In my research, I came across some US based companies selling units. The most popular of these companies is Parrot. It looked promising, and during this time they had announced a new unit the RNB6, which was eventually canceled before its release. The current unit on Amazon showed strong initial support, but multiple complaints from owners after a while. Towards the end of the year, I decided to pull the trigger and purchase a unit. With the seemingly endless lists of units that were almost the same, but not quite, I decided on the 7in Tocado Android Marshmallow unit. Honestly, I'm still not sure what made this unit stand out from the rest. Having a newer version of Android was nice, two Micro-SD card slots was bonus (even though they only support 32g each), and lifetime map updates (bit more on this later). Added bonus is that the price of the unit was over half of the price of the Alpine unit. When I bought the unit, I conceded that this probably would not live very long in the car, almost a stop-gap or experiment. Yeah, I know, a years worth of research into a head unit and I end up buying a cheap Chinese eBay unit with no expectations. Alright, let's get it on! 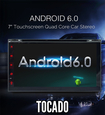
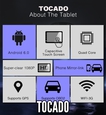
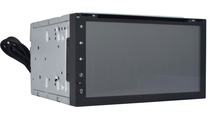
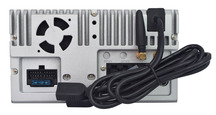
Tocado Android 7in Marshmallow Double Din Stereo with Navigation Sellers Specs:
My Notes (the good):
My Notes (the bad):
** Since I now use SD Cards for music storage, this did not affect me, but be forewarned if you are looking for older iPod integration **. 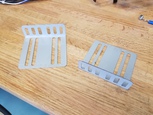
Testing and preparation I ordered the unit on a Wednesday and received the unit the following Monday via DHL. Not bad considering the package originated in Singapore. Before throwing the unit into the car and since I had a perfectly functioning stereo in place, I decided to spend some time with the radio on the bench for testing. I simply wired up the ACC, Battery, and Ground wires up to an older 650w PC power supply. Like I stated before, it takes 50 seconds for the unit to full power up. On the bench this almost seems like eternity, but in actual use, it was a little shorter than the time it takes for me to back out of the garage and down the driveway. Note that the back up camera is usable during the boot up process. So, in reality, the boot up delay is not as bad as I has originally feared. Similar units on eBay tout a sub 20 second boot time. On initial boot, the main screen shows a clock widget, music player widget, and icons for phone, radio, music, navigation, link, and video. At the top is the typical Android system bar and at the bottom are three "shortcut" unlabeled icons: car, Android, and settings. After a little playing around, I discovered that the car icon takes you to another desktop, the Android takes you to your Apps, and settings take you to, well, settings. So far, the only thing that you can change on the main system screen is what app launches when you press either the navigation button or navigation icon and background. Font colors/style for the clock is non-configurable, as well as the font colors. Default background is an "live" blue-bubble background that suits the unit pretty nicely. 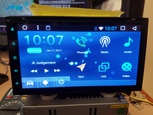
The "car" icon simply takes you to another desktop, though completely empty. Equivalent to swiping right on your Android's screen. This threw me off at first when I accidentally pressed it and I had thought I "lost" my main screen. The first time it happened, I ended up rebooting the radio to get them back. It wasn't until day three that I had figured out that pressing the button toggled between the "desktop" screens and the main screen. Eventually I learned this is where you can drag your apps from the apps screen and arrange them as you like. You can also move various widgets to this. The Android icon is simply the link to the apps screen where all of your installed apps are listed. Preloaded apps include iGo, ES File Explorer, and a PDF reader. Hardware apps include the music and video players, an AUX input app, Bluetooth phone/music app, the button light color control app, and the AM/FM Radio Tuner app. Finally, you have the settings icon. This takes you to a stripped down stock Android settings menu. In this menu are:
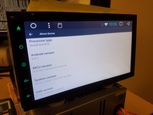
Like I stated above, just about all of these menus are stripped down to the bare bones. I spent the better part of a week off and on drilling through the menus and found some interesting tidbits here and there. A couple of nice things was that you can treat a WIFI hotspot as a metered service, so it won't chew up your data plan. Developer options are mostly what you would find in your typical Android device. Car settings is where things start to get interesting. One of the first things I decided to change was the background. After trying multiple backgrounds, I consistently had a single problem. The white borderless icon fonts seem to blend into every background. Out of frustration, I decided to fire up Photoshop and create a simple green/black background with various filters applied (clouds, followed by tweaked mosaic tiles). Copied it over and applied the background. Even this dark background seem to wash out the font. I then dropped the contrast and brightness level of the background to get everything to work. 

Next step was to change the button color. The 2006 Chrysler 300 has turquoise colored lights, and having a stereo with the default red lights was not going to jive (pictures above were taken after this step). I clicked on the Apps button and selected the color change wheel to adjust the button color. Using the color wheel is much nicer than the AVIC-D3's option of select one of eight colors, or manually entering in 0-255 RGB values. Easy peasy. Since playing my library of MP3s was the primary function, I had to ditch the preloaded music player. Going through Google's PlayStore, I found a slew of players, but four made the initial cut. Dub, Neutron, Poweramp, and Stellio. Each player had it's strengths and weaknesses. I really liked Dub's spectrum analyzer, but it lacked other features. Neutron seemed OK, though I didn't care for the UI too much. I was torn between Poweramp and Stellio, and actually preferred Stellio to Poweramp, but since the unlocker app for Stellio wouldn't work, I defaulted to Poweramp. Picture below is actually Stellio Player. 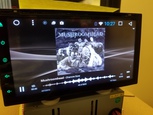
I was hoping to have some screen-bling like a spectrum analyzer, so I had to install another app, Audio Glow from Cypher Cove, for that. The app runs separately from Poweramp, but it does retrieve metadata from it and has the ability to control basic next/previous track functions. The app allows you to make some minor tweaks (colors, amount of background sparkles, fonts, etc). While this app is free, there are additional paid visualizations available. 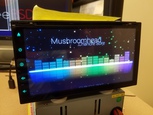
The secondary function of the head unit is navigation. I honestly did not spend much time with the pre-loaded iGo app. Once I found that I could remap the navigation button and icon to another app, I quickly installed Google Maps. Interesting tid-bit, Google Maps can automatically change from day to night modes depending on time of day. This was one of those things I didn't think about until a couple of days before the install. Nothing worse than having a blindingly bright white map screen in the dark. 

Now that I have the unit just the way I want it, it's time to void the warranty! Wait, what? You spent ~$230.00 (including shipping) on this unit, only to tear it apart? Well, hell yeah! Since searching the XDA Forums and Googling Tocado and iTopWay yielded almost no information, I wanted to see what made this thing tick. First step was to try to get around the void warranty tape. I hit it with the heat gun for a couple of seconds and managed to get the adhesive to release, but apparently the money they saved on this unit was spent on security tape, doh! Oh well, nothing a razor blade can't fix. 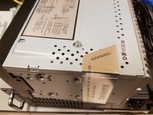
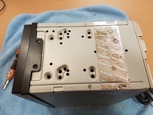
Next, I removed 4 small screws that hold the screen in place. With a board date of Nov 30,2016 it was nice to see it wasn't laying around for a while, though the version 01 may be disconcerting. Google searches for TH8026 and the H183010010080 yielded no information about the display control board. The display screen itself is dated 2013 and Google searches for E330264 and CO-B324-786P-00-00 also yielded no information. 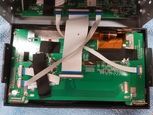
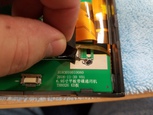
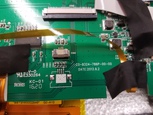
After removing the front panel, it was time to get to the guts. In order to get to them, I needed to remove the DVD Rom drive. Just 4 screws and a ribbon cable. Now we can see the heart of the machine. 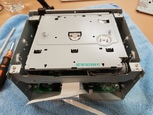
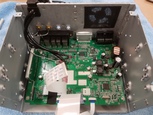
Poking around the MCU for any identifiable number proved to be fruitless. I'm assuming the handwritten 6.0 is the Android version installed. In case someone else can find something: 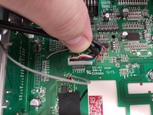
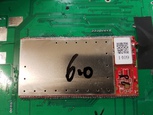
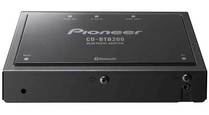
One the top side of the board are the AM/FM tuner and Bluetooth module (roughly 1x1 inch). Picture next to it is Pioneers CD-BTB200 external Bluetooth module, which is substantially bigger at 4in x 6in in size. 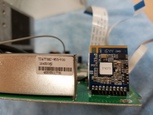
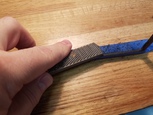
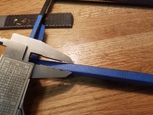
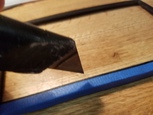
I put everything back together and managed not to have any extra screws. Hooked up the power and everything is working correctly. Time to get this puppy installed. I had been testing the unit on the bench for the past week. During this time, I used local WIFI for internet connectivity. As noted in the eBay listing, the unit supports a 3G USB modem. I contacted the seller (yes again) and was told that because it was Chinese New Year, that it would be a while before he could ship one out. He suggested that I try another vendor. OK then... So I got the part information from the seller and bought a unit from another vendor for under $20.00. I received the USB dongle a few days later and plugged it in to the stereo without the required SIM card. Stereo saw the modem and additional options for it appeared in the Android settings menu. Now it was time to get a SIM card for the dongle. I had planned on using no more than 500MB/mo, and my family's data plan was at it's limit, so I attempted to find a cheap data-only plan for the car. I was hoping to only spend $10.00/mo. Checking around the various Pay-As-You-Go plans and other budget plans, I was unable to find one that would allow me to use this 3G dongle. Surely, in this time of GPS trackers, alarm systems, and even built in car hot-spots, it shouldn't be that hard. Frustrated, I had a spare SIM from a Verizon tablet that had been turned down (wasn't using it). Ah-ha! Simple solution, move the SIM and have Verizon re-activate the SIM. Well, not so fast. Turns out that the three major carriers (Verizon, ATT, T-Mobile) now all restrict what devices can connect to their network based on the device's IMEI (International Mobile Equipment Identity) number. I scouring the internet for some information, including Amazon reviews and various carrier forums and found nothing relevant past 2013. The following weekend, in a strange turn of events, my daughter had accidentally dropped my wife's Samsung Galaxy S5 into sink of water. While the S5 is water resistant, it loses this ability when the USB cover is not in place. This is the same cover the breaks off the phone within 6 months of ownership. Phone seemed to be operating correctly, but any charger plugged in (including the OEM charger) would result in the phone displaying an error message indicating that the charger was not approved. With the battery draining, we made a mad dash to the local Verizon store. At the store, we got my wife a new Galaxy S7. At this time, I showed the salesmen the dongle and explained what it was for. I told them it was going to be used on my car stereo for getting traffic updates. He looked up the IMEI and verified that it was not an "approved" device. His manager happened to be within earshot and came over and suggested I try one of their 4G hotspots. At first I cringed. I envisioned a Linksys or Netgear home router sized device that would need to be wired up to the car (which isn't a huge deal). I was shocked when the salesman handed me an Ellipsis Jetpack hotspot. The device was small (2x3.5 inches) and had a built in battery, with USB charger making it totally portable. Since we had purchased a new phone, they threw in the Jetpack at no extra charge. Yahoo! Installation Before purchasing the Tocado unit, I had gotten the measurements of the Pioneer to use as a reference. The Tocado unit width and height wise is exactly the same size 178x100mm. The length of the Tocado unit is about 6mm longer due to the aluminum heatsink. This was not an issue since the 300 had plenty of room to spare. The following Sunday, I proceeded to pull the Pioneer. This was a bit more time consuming than I had planned. Not so much removing the stereo, heck, that took just a couple of minutes. It was the wire clean up to get the new unit installed that monopolized my time. I previously used snap locks to connect wires and now I wanted to solder my permanent connections and use crimp connectors for any connections that needed to be disconnected. This ended up taking around an hour. The only issue I had was with the faceplate. Turns out that 178x100mm measurement applied to the body of the unit, not the front plastic surround. It was actually around 2mm larger. I fussed around with it for a bit and didn't get anywhere. The faceplate adapter that I had on the Pioneer consisted of two pieces. You had an intermediate piece that handled mounting and filled between the mounting tabs and the OEM stereo surround, then a trim piece that filled in the gap between the mounting and the radio itself. Since I was planning on selling the Pioneer, I opted to order a new dash kit. The Pioneer unit used a Metra kit, but I decided on the Scosch kit from Amazon for the new radio (mostly due to reviews). While I waited on the new kit, I just ran the radio sans trim piece. I received the kit two days later (Prime) and proceeded to cut down the trim piece to fit. Anyone will tell you, trimming plastic is a royal pain in the butt, and this is no different. I had originally started with a rasp file to remove bulk of the material, and then process to sandpaper for the finish, but it was taking substantial to get it down to size. I switch tactics, and decided to cut all but about .5mm with a heated razor blade and then use the rasp/sandpaper to finish it out. 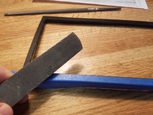
On the road Having a new toy to want to play with when driving a car is a bit dangerous. For years, I had jumped in the car, turned on the stereo, and drove. That's it. Now, there are so many things the unit is capable of, that I have to make sure that I only spend time searching when at stop lights or the car wash. The first day it was installed, when I got home, I had spent 15 minutes in the garage playing with the darn thing before going in the house. A current list of (not real deal breaker) issues with this unit.
Despite the quirks and annoyances, the Chinese Android Double Din stereo actually works pretty good for me. Make no qualms, this is no more than a tablet with a 200watt amplifier stuck to it in a double din package. The bottom line is price. You can't beat it. Would I recommend it? Honestly, depends on who is asking. If you have ever rooted a phone, then yes. If you don't understand what rooting a phone means, then definitely not. This whole process did bring up an interesting thought. I wonder if anyone makes an Android double-din development kit for the Android auto? Back to Chrysler Projects |
|


